Executing your Android Application (AVD's) (Android-Part 3)
[Hello Geeks, hope you have gone through this postand have a good understanding of Android projects before proceeding further. To test / debug our Android Application, we can use any of available methods :]{style="font-size: 14px;line-height: 1.5em"}
1. We can use the Android Virtual Device (we'll create one shortly) to execute this application.
2. We can directly copy the APK to the phone to test the application.
3. We can also use an Android Emulator like Bluestacks to test our application. Benefit of using Bluestacks is that it starts much faster than AVDs.
1. We'll discuss first option in detail. The second option require a simple setup. On most devices running Android 3.2 or older, you can find the option under Settings > Applications > Development. On Android 4.0 and newer, it's in Settings > Developer options. (Detailed Explanation here).The third option required downloading and installing Bluestacks emulator. Bluestacks is a free android emulator available for both Windows and Mac platform. It can be used to run most of the android applications including Whatsapp, games etc.
To create new AVD (Android Virtual Device) follow these steps
- Goto Windows Menu -> Android Virtual Device Manager.
- Click 'New' to create a new Device.
- Fill in mandatory fields like AVD Name, Device (preferrably Nexus 4, 4.7"as it is a portrait device), Target API 18.
- Fill in Internal Storage and SD Card size as 200 MB (Enough for applications). Press Ok to create that device. Now close the AVD window.
Now we will be able to use this device for executing the Android Applications we create. But we may also opt for Mobile Phone / Bluestacks method as they are very fast. The AVDs take a long time to start, approx 2 minutes on core i7 4th generation processor to over 5-7 minutes on old systems. If you still prefer executing application using AVDs then you must start AVD when you start the Eclipse IDE, so that the AVD loads while you code your application.
To execute the first Android Project Goto "Run" from Menu Bar and select first option, or you could simply use Ctrl+ F11. Choose your AVD, which would be the one just created, or your phone(if attached) / bluestacks (if installed).Preview of this application (Executed on Bluestacks) is shows here

A similar application with two labels and buttons executed on Android 4.0 Virtual Device is as shown below : 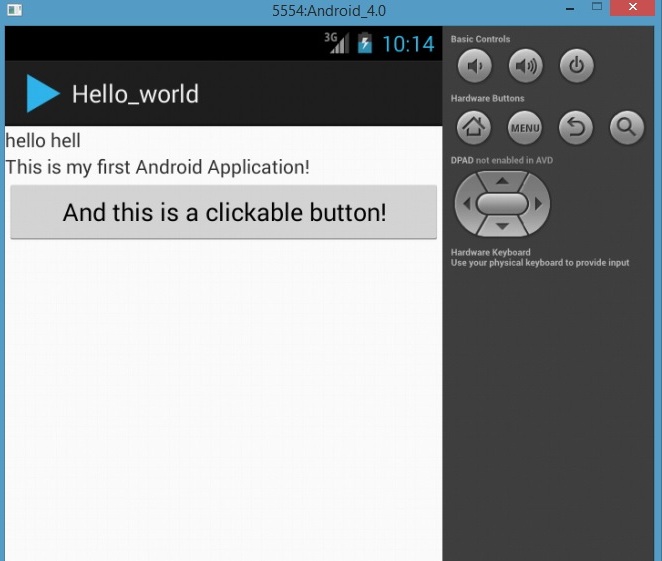
This was a very short tutorial to setup AVD and execute your first android application.In the next Article, we will create simple application by creating its GUI in layout.xml file and obtaining IDs in the JAVA code. Till then stay tuned & comment if you have any suggestions/doubts.